There are many types of noise or artifacts and even more denoising algorithms. In the following article, the
terms noise
and grain will sometimes be used synonymously. Generally, noise is an unwanted artifact and grain was added to
create a certain effect (flashbacks, film grain, etc) or to prevent banding. Especially the latter may not
always
be beneficial to your encode, as it increases entropy, which in turn increases the bitrate without improving the
perceived
quality of the encode (apart from the gradients, but we'll get to that).
Grain is not always bad and even necessary to remove or prevent banding artifacts from occuring, but studios
tend to
use dynamic grain which requires a lot of bitrate. Since you are most likely encoding in 10 bit, banding isn't
as
much of an issue, and static grain (e.g. f3kdb's grain) will do the job just as well.
Some people might also like to denoise/degrain an anime because they prefer the cleaner look. Opinions may vary.
This section will be dedicated to explaining different types of noise which you will encounter. This list is not
exhaustive, as studios tend to do weird and unpredictable things from time to time.
1. Flashbacks
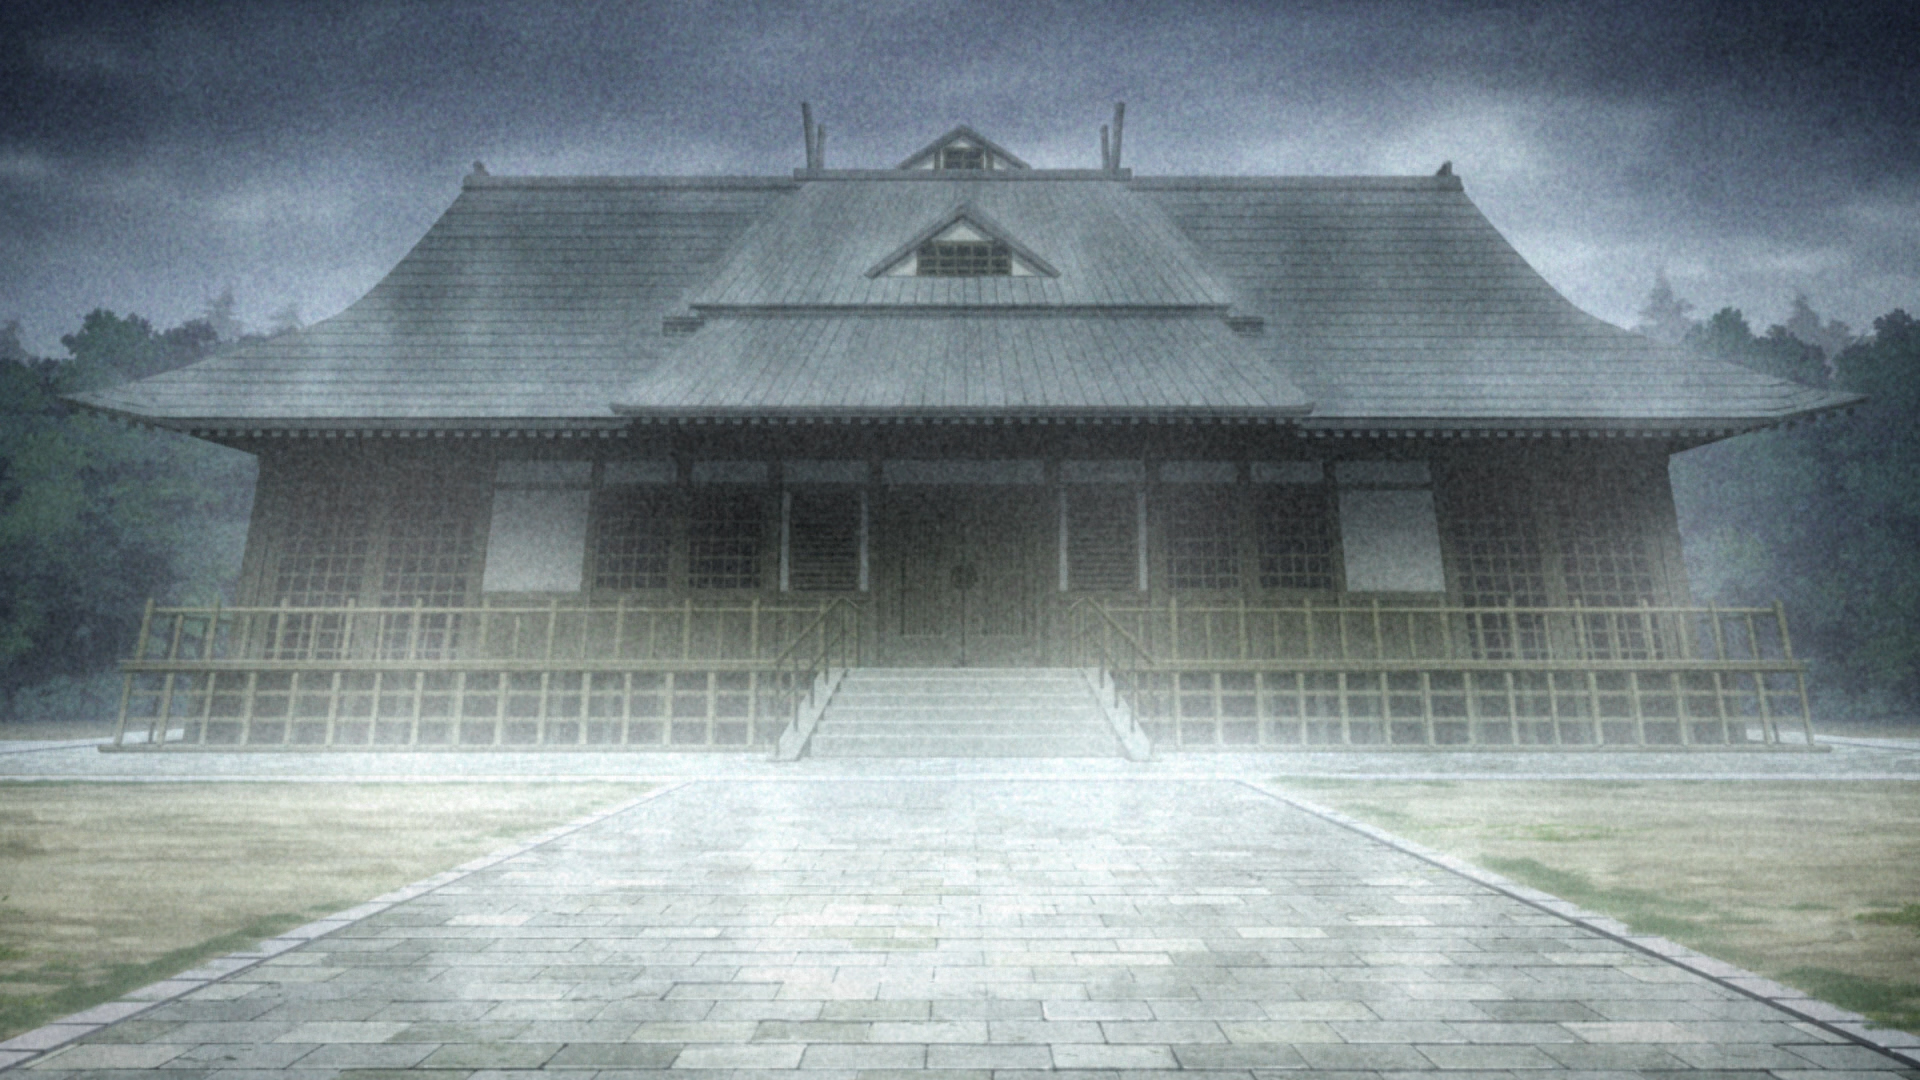
Image: Shinsekai Yori episode 12 BD
Flashbacks are a common form of artistic film grain. The grain is used selectively to create a certain
atmosphere and should
not be removed. These scenes tend to require quite high bitrates, but the effect is intended, and even if
you
were
to try, removing the grain would be quite difficult and probably result in a very blurred image.
Since this type of grain is much stronger than the underlying grain of many sources, it should not be
affected by
a normal denoiser, meaning you don't have to trim around these scenes if you're using a denoiser to remove
the general background noise from other scenes.
2. Constant film grain
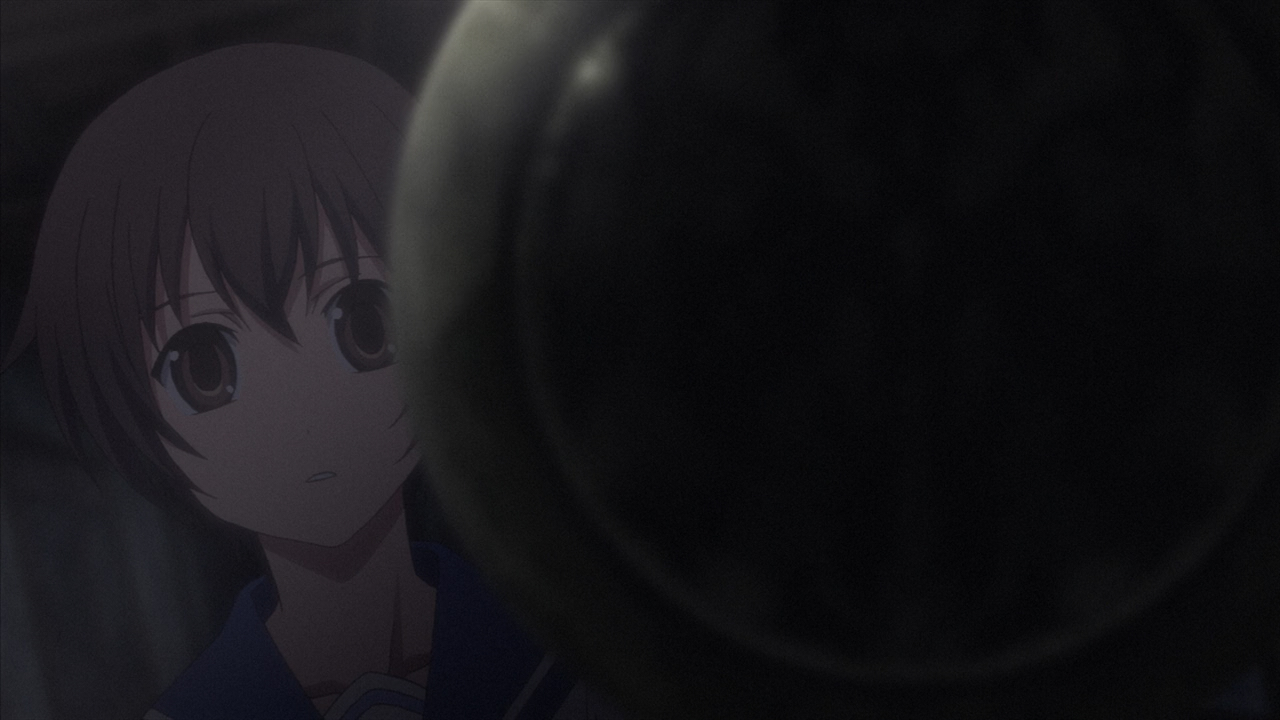
Image: Corpse Party episode 1, encoded by Gebbi @Nanaone
Sometimes all scenes are overlaid with strong film grain similar to the previously explained flashbacks.
This type of source is rare, and the only way to remove it would be a brute force denoiser like QTGMC. It is
possible to
get rid of it, however, generally I would advise against it, as removing this type of grain tends to change
the mood of a given scene. Furthermore, using a denoiser of this calibre can easily destroy any detail
present, so you will have to carefully tweak the values.
3. Background grain
This type is present in most modern anime, as it prevents banding around gradients and simulates detail by
adding random information to all surfaces. Some encoders like it. I don't. Luckily, this one can be removed
with relative ease, which will notably decrease the required bitrate. Different denoisers will be described
in a later paragraph.
4. TV grain

Image: Kekkai Sensen episode 1, encoded by me
This type is mainly used to create a CRT-monitor or cameraesque look. It is usually accompanied by
scanlines and other distortion and should never be filtered. Once again, you can only throw more bits at the
scene.
5. Exceptional grain
Image: Seirei Tsukai no Blade Dance episode 3, BD
Some time ago, a friend of mine had to encode the Blu-rays of Blade Dance and came across
this scene. It is about three minutes long, and the BD transport stream's bitrate peaks at more than
55mbit/s, making the Blu-ray non-compliant with the current Blu-ray standards (this means that some BD
players may just refuse to play the file. Good job, Media Factory).
As you can see in the image above, the source has
insanely strong grain in all channels (luma and chroma). FFF chose to brute-force through this scene by
simply letting x264 pick whatever bitrate it deemed appropriate, in this case about 150mbit/s. Another (more
bitrate-efficient solution) would be to cut the scene directly from the source stream without re-encoding.
Note that you can only cut streams on keyframes and will not be able to filter (or scale) the scene
since you're not re-encoding it. An easier solution would be using the --zones parameter to increase the crf
during the scene in question. If a scene is this grainy, you can usually get away with higher crf values.
So let's say your source has a constant dynamic grain that is present in all scenes, and you want to save
bitrate in your encode or get rid of the grain because you prefer clean and flat surfaces. Either way, what
you're looking for is a denoiser. A list of denoisers for your preferred frameserver can be found
here
(Avisynth) or
here (Vapoursynth).
To compare the different filters, I will use two scenes – one with common "background grain" and one with
stronger grain. Here are the unfiltered images:

An image with "normal" grain – the type you would remove to save bitrate. Source: Mushishi Zoku Shou OVA
(Hihamukage) Frame 22390. Size: 821KB
Note the faint wood texture on the backpack. It's already quite blurry
in the source and can easily be destroyed by denoising or debanding improperly.

A grainy scene. Source: Boku Dake ga Inai Machi, Episode 1, Frame 5322. Size: 727KB
I am well aware that
this is what I
classified as "flashback grain" earlier, but for the sake of comparison let's just assume that you want to
degrain this type of scene.
Furthermore, you should note that most denoisers will create banding which the removed grain was masking
(they're technically not creating the banding but merely making it visible). Because of this, you will usually
have to deband after denoising.
1. Fourier Transform based (dfttest, FFT3D)
Being one of the older filters, dfttest has been in development since 2007. It is a very potent denoiser
with good detail retention, but it will slow your encode down quite a bit, especially when using Avisynth due to
its lack of multithreading.
The Vapoursynth filter is faster and should yield the same results.
FFT3DGPU is
hardware accelerated and uses a similar (but not the same) algorithm. It is significantly faster but
less precise in terms of detail retention and possibly blurring areas. Contra-sharpening can be used to
prevent the latter. The filter is available for Avisynth and Vapoursynth without major differences.

sigma = 0.5; 489KB

sigma = 4; 323KB
2. Non-local means based (KNLMeans, TNLMeans)
The non-local means family consists of solid denoisers which are particularly appealing due to their
highly optimized GPU/OpenCL implementations, which allow them to be run without any significant speed
penalty.
Using the GPU also circumvents Avisynth's limitation to one thread, similar to FFT3DGPU.
Because of
this, there is no reason to use the "regular" (CPU) version unless your encoding rig does not have a GPU. K
NL can remove a lot of noise while still retaining quite a
lot of detail (although less than dft or BM3D). It might be a good option for older anime, which tend
to have a lot of grain (often added as part of the Blu-ray "remastering" process) but not many fine
details. When a fast (hardware accelerated) and strong denoiser is needed, I'd generally recommend using
KNL rather than FFT3D.
One thing to highlight is the Spatio-Temporal mode of this filter. By
default, neither the Avisynth nor the Vapoursynth version uses temporal reference frames for denoising. This can
be
changed in order to improve the quality by setting the d parameter to any value higher than zero.
If your material is in 4:4:4 subsampling, consider using "cmode = true" to enable denoising of the
chroma planes. By default, only luma is processed and the chroma planes are copied to the denoised
clip.
Both of these settings will negatively affect the filter's speed, but unless you're using a
really old GPU or multiple GPU-based filters, your encoding speed should be capped by the CPU rather than
the GPU.
Benchmarks and documentation
here.

h = 0.2, a = 2, d = 3, cmode = 1; 551KB
cmode = 0 for comparison; 733KB

h = 0.5, a = 2, d = 3, cmode = 1; 376KB
BM3D
This one is very interesting, very slow, and only available for Vapoursynth. Avisynth would probably die
trying to run it, so don't expect a port anytime soon unless memory usage is optimized significantly.
It would technically work on a GPU, as the algorithm can be parallelized without any issues
[src],
however no such implementation exists for Avisynth or Vapoursynth. (If the book doesn't load for you,
try scrolling up and down a few times and it should fix itself)
BM3D appears to have the best ratio of filesize and blur (and consequently detail loss) at the cost of
being the slowest CPU-based denoiser on this list. It is worth noting that this filter can be combined
with any other denoiser by using the "ref" parameter. From the
documentation:
Employ custom denoising filter as basic estimate, refined with V-BM3D final estimate.
May compensate the shortages of both denoising filters: SMDegrain is effective at spatial-temporal
smoothing but can lead to blending and detail loss, V-BM3D preserves details well but is not very
effective for large noise pattern (such as heavy grain).

radius1 = 1, sigma = [1.5,1,1]; 439KB

radius1 = 1, sigma = [5,5,5]; 312KB
Note: This image does not use the aforementioned "ref" parameter
to improve grain removal, as this comparison aims to provide an overview over the different filters by
themselves, rather than the interactions and synergies between them.
SMDegrain
SMDegrain seems to be the go-to-solution for many encoders, as it does not generate much blur and the
effect seems to be weak enough to save some file size without notably altering the image.
The
substantially weaker denoising also causes less banding to appear, which is particularly appealing when
trying to preserve details without much consideration for bitrate.

Even without contra-sharpening, SMDegrain seems to slightly alter/thin some of the edges. 751KB

In this image the "sharpening" is more notable. 649KB
One thing to note is that SMDegrain can have a detrimental effect on the image when processing with
chroma. The Avisynth wiki describes it as follows:
Caution: plane=1-4 [chroma] can sometimes create chroma smearing. In such case I
recommend denoising chroma planes in the spatial domain.
In practice, this can destroy (or add) edges by blurring multiple frames into a single one.
Look at her hands
Edit: I recently had a discussion with another encoder who had strong
chroma artifacts (much worse than the lines on her hand), and the cause was SMDegrain. The solution can be
found
on his
blog. Just ignore the german text and scroll down to the examples. All you have to do is split the
video in its individual planes and denoise each of them
like you would denoise a single luma plane. SMDegrain is used prior to scaling for the chroma planes, which
improves the performance. You would have to do the same in Vapoursynth do avoid the smearing, but
Vapoursynth has BM3D which does the same job better, so you don't have to worry about SMDegrain and its
bugs.
Waifu2x
Waifu2x is an image-upscaling and denoising algorithm using Deep Convolutional Neural Networks. Sounds
fancy but uses an awful lot of computing power. You can expect to get ≤1fps when denoising a 720p image
using waifu2x on a modern graphics card. Your options for denoising are noise level 1, 2 ,or 3, with
level 2 and 3 being useless because of their nonexistent detail retention. Noise level 1 can remove grain
fairly well, however the detail retention may vary strongly depending on the source, and due to its
limited options (none, that is) it can not be customized to fit different sources. Either you like the
results or you use another denoiser. It is also worth noting that this is the slowest algorithm one
could possibly use, and generally the results do not justify the processing time.
There are other
proposals for Deep Learning based denoising algorithms, however most of these were never made available
to the public.
[src]

The more "anime-esque" parts of the image are denoised without any real issues, but the more realistic
textures (such as the straw) might be recognized as noise and treated accordingly.
 Edit:
Edit: Since this section was written there have been a few major updates to the
Waifu2x algorithm. The speed has been further optimized, and more settings for the noise removal feature have
been added. These features make it a viable alternative to some of the other denoisers on this list (at least
for certain sources), however it is still outclassed in terms of speed. The newly added upConv models are
significantly faster for upscaling and promise better results. In their current state, they should not be used
for denoising, as they are slower than the regular models and try to improve the image quality and sharpness
even without upscaling, which may cause aliasing and ringing.
Debanding
Some of these may be quite impressive in terms of file size/compressibility, but they all share a common
problem: banding. In order to fix that, we will need to deband and apply grain to the gradients. This may seem
counterintuitive, as we have just spend a lot of processing time to remove the grain, but I'll get to that
later.

The BM3D image after an f3kdb call with a simple
mask
to protect the wooden texture (I won't go into detail here, as debanding is a topic for another day). Hover over
the image to switch to the source frame.
Source size: 821KB. Denoised and debanded frame: 767KB. This does not sound too impressive, as it is only a
decrease of ~7% which (considering the processing time) really isn't that much, however our new grain has a
considerable advantage: It is static. I won't delve too deep into intra-frame compression, but most people will
know that less motion = lower bitrate. While the source's grain takes up new bits with every new frame, our
grain only has to be stored once per scene.

 Back to index